 I’m pleased with the way Huwyl’s costume turned out this year. One of the things I am most pleased with is repurposing some favourite old trousers of mine. Here’s how I made the costume.
I used this Butterick pattern for the trousers and it worked really well. I had made a pair of trousers for Huwyl during the summer using brown linen and I liked the simplicity of this pattern. The only change I made was cutting a good inch and a half off the waistband at the top as Huwyl doesn’t like anything that touches his bellybutton. Yes, seriously.

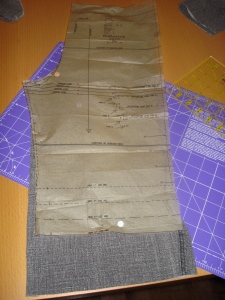
I laid the pattern out over the old trousers and used the existing side seams to minimise my sewing. I allowed a generous few inches beneath the pattern as I wanted a ‘ragged’ effect.


Not having to sew the side seams made the process a lot quicker, I simply stitched the pieces together at the crotch and turned them to make the waistband. I cut about an inch and a half off the pattern to bring them in that essential below belly button height.

You’ll notice that the trousers need to be inside out when you do this. You need to keep one leg right side out then place it inside the reversed leg. That way the right sides are together. I took Huwyl’s waist measurement then added 1/2 and inch for the elastic. The next bit was really fun, creating the ‘rags’ at the bottom. I used my rotary cutter and ruler for this.

To keep the fray from getting excessive I did a very small and close zig zag stitch around the peaks. It is not quite a satin stitch but still small.

Then I tugged at the fabric to create the frayed piratey look I was after.

The tabard I made in two colours, red for the front and black at the back. I double turned the edges and hem then used contrasting bias binding for the neck openings. Having an opening at front and back makes the outfit easy to get on and off, though I think this one was a little big.

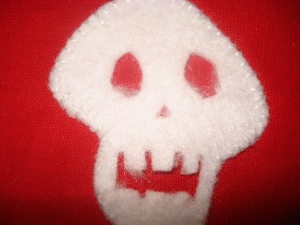
The skull and cross bones I traced onto the fusible webbing paper backing then cut out and ironed on. It didn’t stick well and Stephen had the great idea of embroidering around the edges; I did it and love it! It gives a nice feeling of being finished and the irregular sized stiches (yes that was deliberate!) adds to that authentic pirate feel.


I really enjoyed making this outfit and it was relatively simple. The eyepatch I made as a last minute addition on request from the pirate boy himself, I basically measured his eye and made it to size with fine elastic. Easy!
The truest sign of success is that Huwyl wore the costume for three days in a row; in fact he actually wearing it now over a week after Halloween. Just as I’d hoped this is a welcome addition to our dressing up corner. I love seeing my little pirate digging for treasure and hope to see his little brother taking over from him in a few years time.

As the boy himself would say “Gaaaaar!”. I couldn’t put it better myself.